Okay, first things first….yes, I would normally hope that a technical director or someone else would print me off the groundplan I want for taping out the set, and that it would be in ½ -inch scale. For various reasons, however, this is not always a given when working on a production. Most of the time, I am indeed given a PDF version of the groundplan somewhere along the way. In one case, I was flexing my prep week and wanted to plot the points from the comfort of my home, before I ever stepped foot at the rehearsal space; I’d been given rough directions as to what would or wouldn’t fit. Today another professional stage manager came across the issue of the theatre having a plotter with big enough paper, but that it had run out of ink and due to the holidays, etc, they were not going to be able to have it ready for her team in time. My quick answer was to print it as a poster via the free Adobe Reader software.
We did have an issue at first where her computer had the printer option grayed-out, but she sent the file to me and I had no issues. She eventually got it to work on an older computer. We’re not quite sure what that issue was, but here are the steps we talked through today, to print a true-to-scale groundplan from the (did I mention, free) Adobe Reader program.
You can print the entire document as displayed on the page, or you may decide it has a lot of extra margins and theatre elements that aren’t necessary for your immediate needs. In the case of the groundplan I’m pulling for this example (Natasha, Pierre and the Great Comet of 1812, as designed by Chris Rees for Tantrum Theater), if I printed the entire groundplan at full size it would have been 15 pages of regular paper. However, if my goal was to measure a groundplan for the rehearsal hall, I wasn’t going to need the elevation on the side or the entire seating area necessarily, and it wouldn’t have all fit in our rehearsal hall anyway. You can play around with the zoom feature in Adobe Reader. Mine wanted to jump between 50 and 60% zoom, but I could manually input 55% which gave me a view from all the way to the back wall of the stage as well as the beginning of the downstage voms (and plenty of room on each side). Note: You may be able to crop some groundplans to fit the area you want, but in the case of the ones I was trying today, they had document protections that would not allow me to do so. Adobe Reader doesn’t have a crop feature in the free program, but if you have a free account, you can crop a PDF using this link…assuming it’s not a protected file. Instead, choose to mess with the “current view” before printing.
From here, select your Print command. In this particular case, under “Pages to Print” I selected “More options” and then “Current View.” Then under “Page Sizing and Handling”, instead of the default option of “Size”, I selected the second button of “Poster.” (Note, this Poster option was grayed out for my friend until she tried a different computer.) I highly recommend checking “Cut marks” as well – this will give you printed guides in each corner of where to cut or overlap your pages. I’m not sold either way yet on the overlap part or how big to make it (teeny seems to work), so you can play around with that. Here’s Microsoft’s explanation of printing to poster, including a description of the overlap. Sometimes adding the cut marks can add additional pages to print, but I think it’s worth it vs the frustration of being able to line up the pages later without them. It’s also why I was glad to figure out the “current view” option so you can play around with how many pages to print versus exactly what you need to include of the groundplan. If cutting off half an audience seat subtracts three pages of printing, I’ll go without the seat to save paper.
Below are two examples of the difference in printing the entire document versus the zoomed in current view.
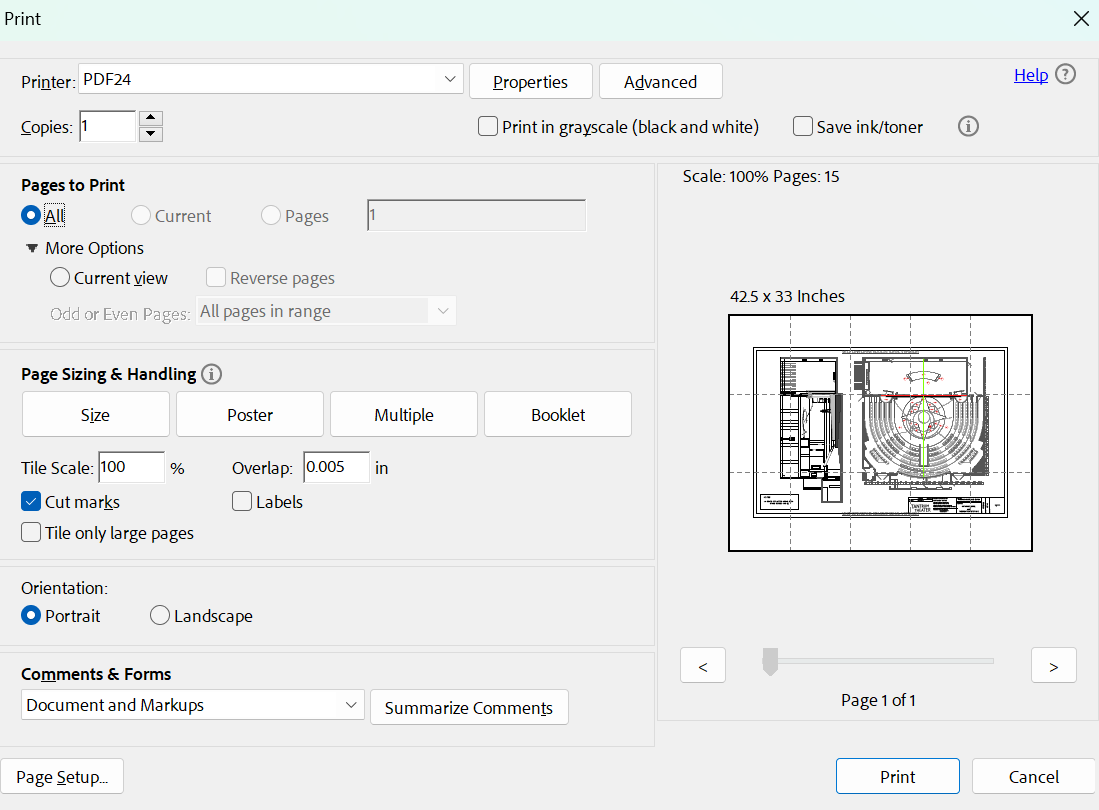
Had I printed this entire PDF groundplan as a poster at full scale, it would have used 15 pages:
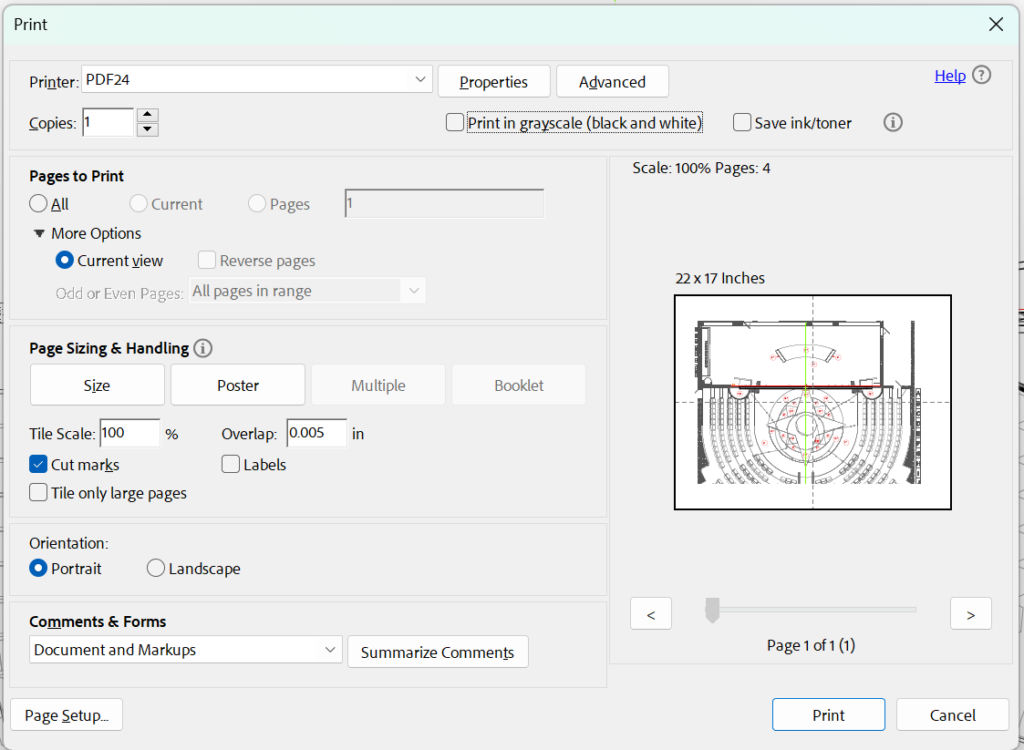
By adjusting the current view of the main document to what I thought might fit in the rehearsal hall, and then selecting its print option as a poster, I reduced it to just 4 pages to print, cut, and tape.
Now to the assembly portion. You will find cut mark guidelines (shaped like plus signs, to show both the vertical and horizontal boundaries) at the four corners of each page. I’d recommend NOT cutting at least one edge of each one you are connecting, so that you have more paper to tape to, as well as be able to see the hashmarks. For instance, start with your furthest upstage right page, and don’t cut ANY of it. Next find the one just onstage of that one, and only cut off the stage right side of it, going exactly off those cut marks. You can lightly tape the front side of the paper until you are sure it’s lined up, but you can make a wide swath of tape on the back for security once you’ve got it figured out…and even if it wasn’t quite right, if you pull up that tape it likely won’t ruin the printed side (been there, done that). Then decide if you’re going to go back and tape the front once you know you don’t need any more adjustments. When you get to attaching the piece downstage of the original corner piece, now cut off the top of that piece to match to the original, and so on. Eventually, you can end up with an assembled groundplan from multiple pieces of paper, and in complete full scale from the original.
Hope this is helpful for you!
Additional Printing Tips for Groundplans
You can have a business print it for you
Several peers have recommended that places like FedEx Office, Kinko’s, Staples, and Office Depot can likely print the groundplan for you.
Print to Fit vs. Actual Size
If you are ever printing in PDF, make sure you know whether you want to “print to fit” – which is often the default – or print to actual scale. Only things that are selected as “actual size” will be something you can easily measure with your scale rule. You might also be able to measure if you do a custom scale like 50% but even that you should doublecheck that it printed the way you think you planned before you get crazy with measuring. I also have a piece of “1/4” graph paper” saved to my computer for the times I want to make my own groundplan for something. This is VERY crucial to print to actual size. You can download your own copy at the aptly named printfreegraphpaper.com.
What if you get a weird size, especially one too small?
Recently I received a groundplan that was in 3/8” scale, and after a while I realized it was that ratio because that was the biggest scale that would fit appropriately in the plotter that the theatre had. Now that I’ve thought about it more, had I wanted to be more accurate in my tape out, I might have asked the designer to give me a PDF in ½” scale, and printed out just the rehearsal hall areas myself. As it was, I wished it had been more exact, but that 1/8” didn’t matter so much in execution for that particular rehearsal hall. (Background: I worked with the Radio City Rockettes, where my spike marks had to be exact by ¼ to ½” of accuracy, and the spike marks for various pieces had to be exactly a specific length, so I have….feelings about accurate tapeouts. Particularly when we had to re-do them at times, especially the pesky dance numbers if they appeared askew. Most of you will not have to be this exact, of course, but that was my training at an early impressionable age, which often rears its insistent head.)
Making Mini Groundplans
You don’t usually need to be able to measure anything on a mini groundplan – this is something you create for your own notes, whether to make presets, or insert in a blocking page, etc. The quickest way to make one to fit a single piece of paper would be to do my original instructions, but instead of Poster, choose “Size” and then “Print to Fit.”
However, I usually want to get rid of many of the lines that are in the groundplan, so I will take a screenshot of the groundplan PDF, import that to a photo editing software, including one of many free ones, and then erase those lines to my heart’s content, or cover them up with a big white box on top of the image. I may leave a few hashmarks as indicators for those things I erased, or make myself versions with and without them. Then I save those images to my Google Drive and make them available to the team for whatever needs we may find.
Oh, those dreamy Educational Discounts
While you have access to educational discounts, whether as a student or as a “professor” take advantage of the lower cost and/or free programs out there. I can sometimes be counted as a staff member when a theatre is connected to a school and I have gotten some GREAT discounts then, especially if I have a school ID for the meantime. I’m looking forward to some contract in the future when I might be able to get a Vectorworks Educational program and be able to do some groundplan viewing of my own. Ah, to be able to add and remove layers on my own, or calculate measurements by plotting points on a screen…until I find something affordable for freelancers, I’ll work with my free shortcuts the way I can! Please do drop a comment for suggested programs. I’m currently playing around with the free PDF24 suite since I lost my paid Adobe Acrobat program with the last computer upgrade, but it’s cumbersome.